Add Barista Widget to Sharepoint
Overview
You can deploy the Barista widget on SharePoint by using a SharePoint Framework (SPFx) Application Customizer for clients. This will allow you to easily deploy the Barista Widget throughout a customer's SharePoint environment (either to all the SharePoint sites or to select SharePoint sites).
This document provides instructions to deploy Barista Widget to SharePoint specifically.
For details on the Widget code, if you want to change colors or features, please check the Barista Widget documentation.
Prerequisites
To successfully deploy the Barista widget to a customer's SharePoint environment, you will need:
SharePoint:
- Admin permissions to the SharePoint site where the widget will be displayed, and admin permissions that can be used for app deployment.
- An app catalog in SharePoint Online.
- A SharePoint development environment set up on your computer.
- Access to the Barista-SharePoint source code.
- SharePoint administrator permissions to deploy the package. You can also share the SP package with the site's admin, so they can go through their change process for deployment.
- Knowledge beforehand of whether you would like to deploy Barista across all site collections, or if you prefer to deploy to individual site collections manually before the solution package is completed.
- Location for the Barista bot on the site.
Barista:
- Admin permissions to Barista Control Center.
- The customer's SharePoint domain added to the whitelist to allow the Barista app to work. Please reach out to an Espressive Professional for this.
- The Barista tenant URL for the customer.
Setup the Barista Widget Data Fields
Before you package and deploy the Barista widget to SharePoint, make the following changes in the source code. Below is a sample of the default code — for more details, see the Barista Widget documentation.
<script
  data-color="#0082C8"
  data-position="bottom left"
  data-message="Hi! Do you need help?"
  data-bot-name='CustomBot'
  src="https://{tenant}.espressive.com/embed/index.js"
>
</script>
| Field | Description |
|---|---|
| Tenant URL | The Barista tenant URL of the client. |
| Color | Default is #0082C8, but this will need to be set according to the customer's branding guide. |
| Position | Default is bottom right. |
| Message | This is how the bot will greet your customers. |
| BotName | Default is Barista, but you may want to change this to match your branding and service. |
These changes will need to be done in the elements.xml file, in the ClientSideComponentProperties configuration:
Barista-SharePoint > SharePoint > elements.xml
Deploying to All SharePoint Sites
By default, Barista will not deploy to all SharePoint sites in a customer's tenant. If the customer wishes to deploy Barista automatically across all SharePoint sites, add the following code in the package-solution.json file, in the solution configuration:
"skipFeatureDeployment": true,
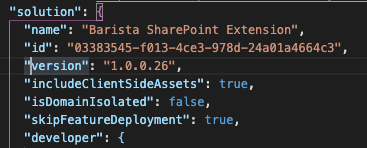
This file can be found in Barista-SharePoint > Config > package-solution.json.
If this line is not included in the package-solution.json file, Barista can be activated on individual SharePoint sites as needed.
Deploy Solution Package to SharePoint
The steps below require Admin permissions in App Catalog.
-
Navigate to the app catalog in your SharePoint tenant.
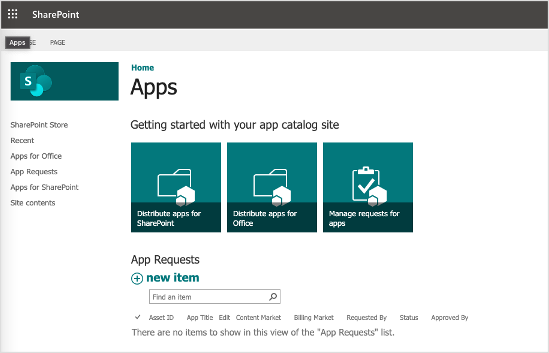
-
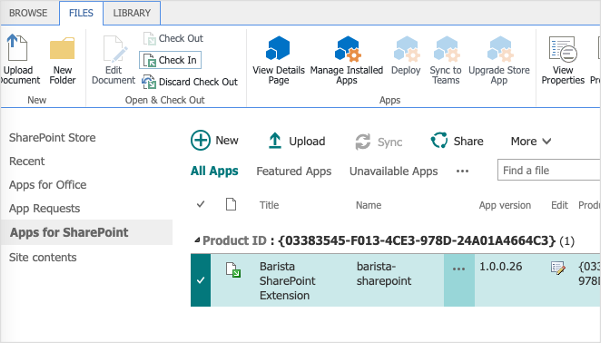
Click Apps for SharePoint.
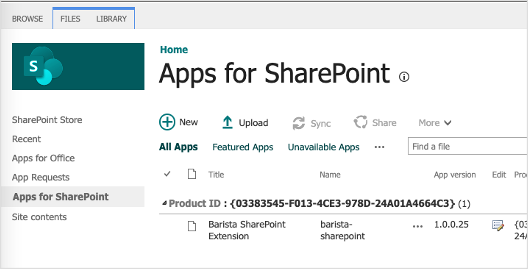
-
Click the Upload button and select the Barista SharePoint package from your computer.
-
Once uploaded, you will be asked to deploy the Barista SharePoint extension. Click Deploy.
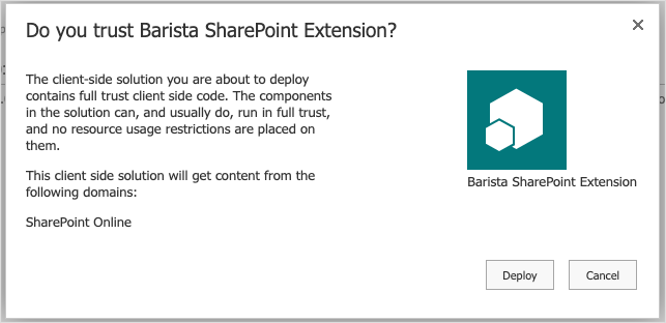
-
You will notice that the Barista SharePoint Extension solution status is set to Checked out. Select the solution and click the Check in button on the top toolbar.
-
If your solution hasn't automatically been deployed to all site collections, you will need to activate Barista on individual sites.
The Barista extension can only be activated by Site Owners.
Activate the Barista Extension in a SharePoint Site
The steps below must be completed by the SharePoint site admin.
-
Navigate to the site collection home page where you have Site Owner permissions.
-
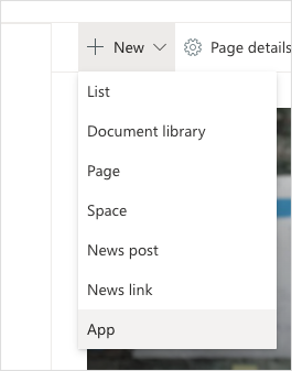
From the home page, click the + New dropdown and select App.
-
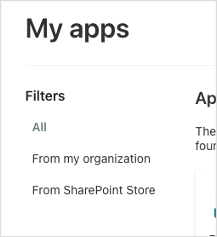
Select the From my organization option from the filters on the left-hand side.
-
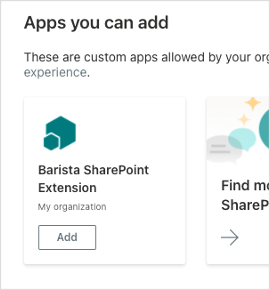
You will now be able to add the Barista SharePoint Extension from the filtered list of apps.
-
Navigate back to the home page of the SharePoint site, and Barista will be showing as a clickable icon on the page.
Note: The default position for Barista is the bottom right corner of the page. If you need to change the position, please notify your CS representative before they build the solution package.