BMC ITSM Module
Prerequisites
Before configuring the module, make sure you have:
- The URL of the BMC ITSM instance that you want to connect to.
- A BMC ITSM username and password for an account authorized to access the required data.
- Network access from the Actions environment to the BMC ITSM instance.
- The names of the BMC ITSM projects you want to configure.
Creating the Module Instance
You need to configure a module instance for the BMC ITSM environment that you want to integrate with.
- Go to Main Menu > Configuration > Integrations and Modules.
- From the top right corner of Integrations, click +. The Integrations Configuration window appears.
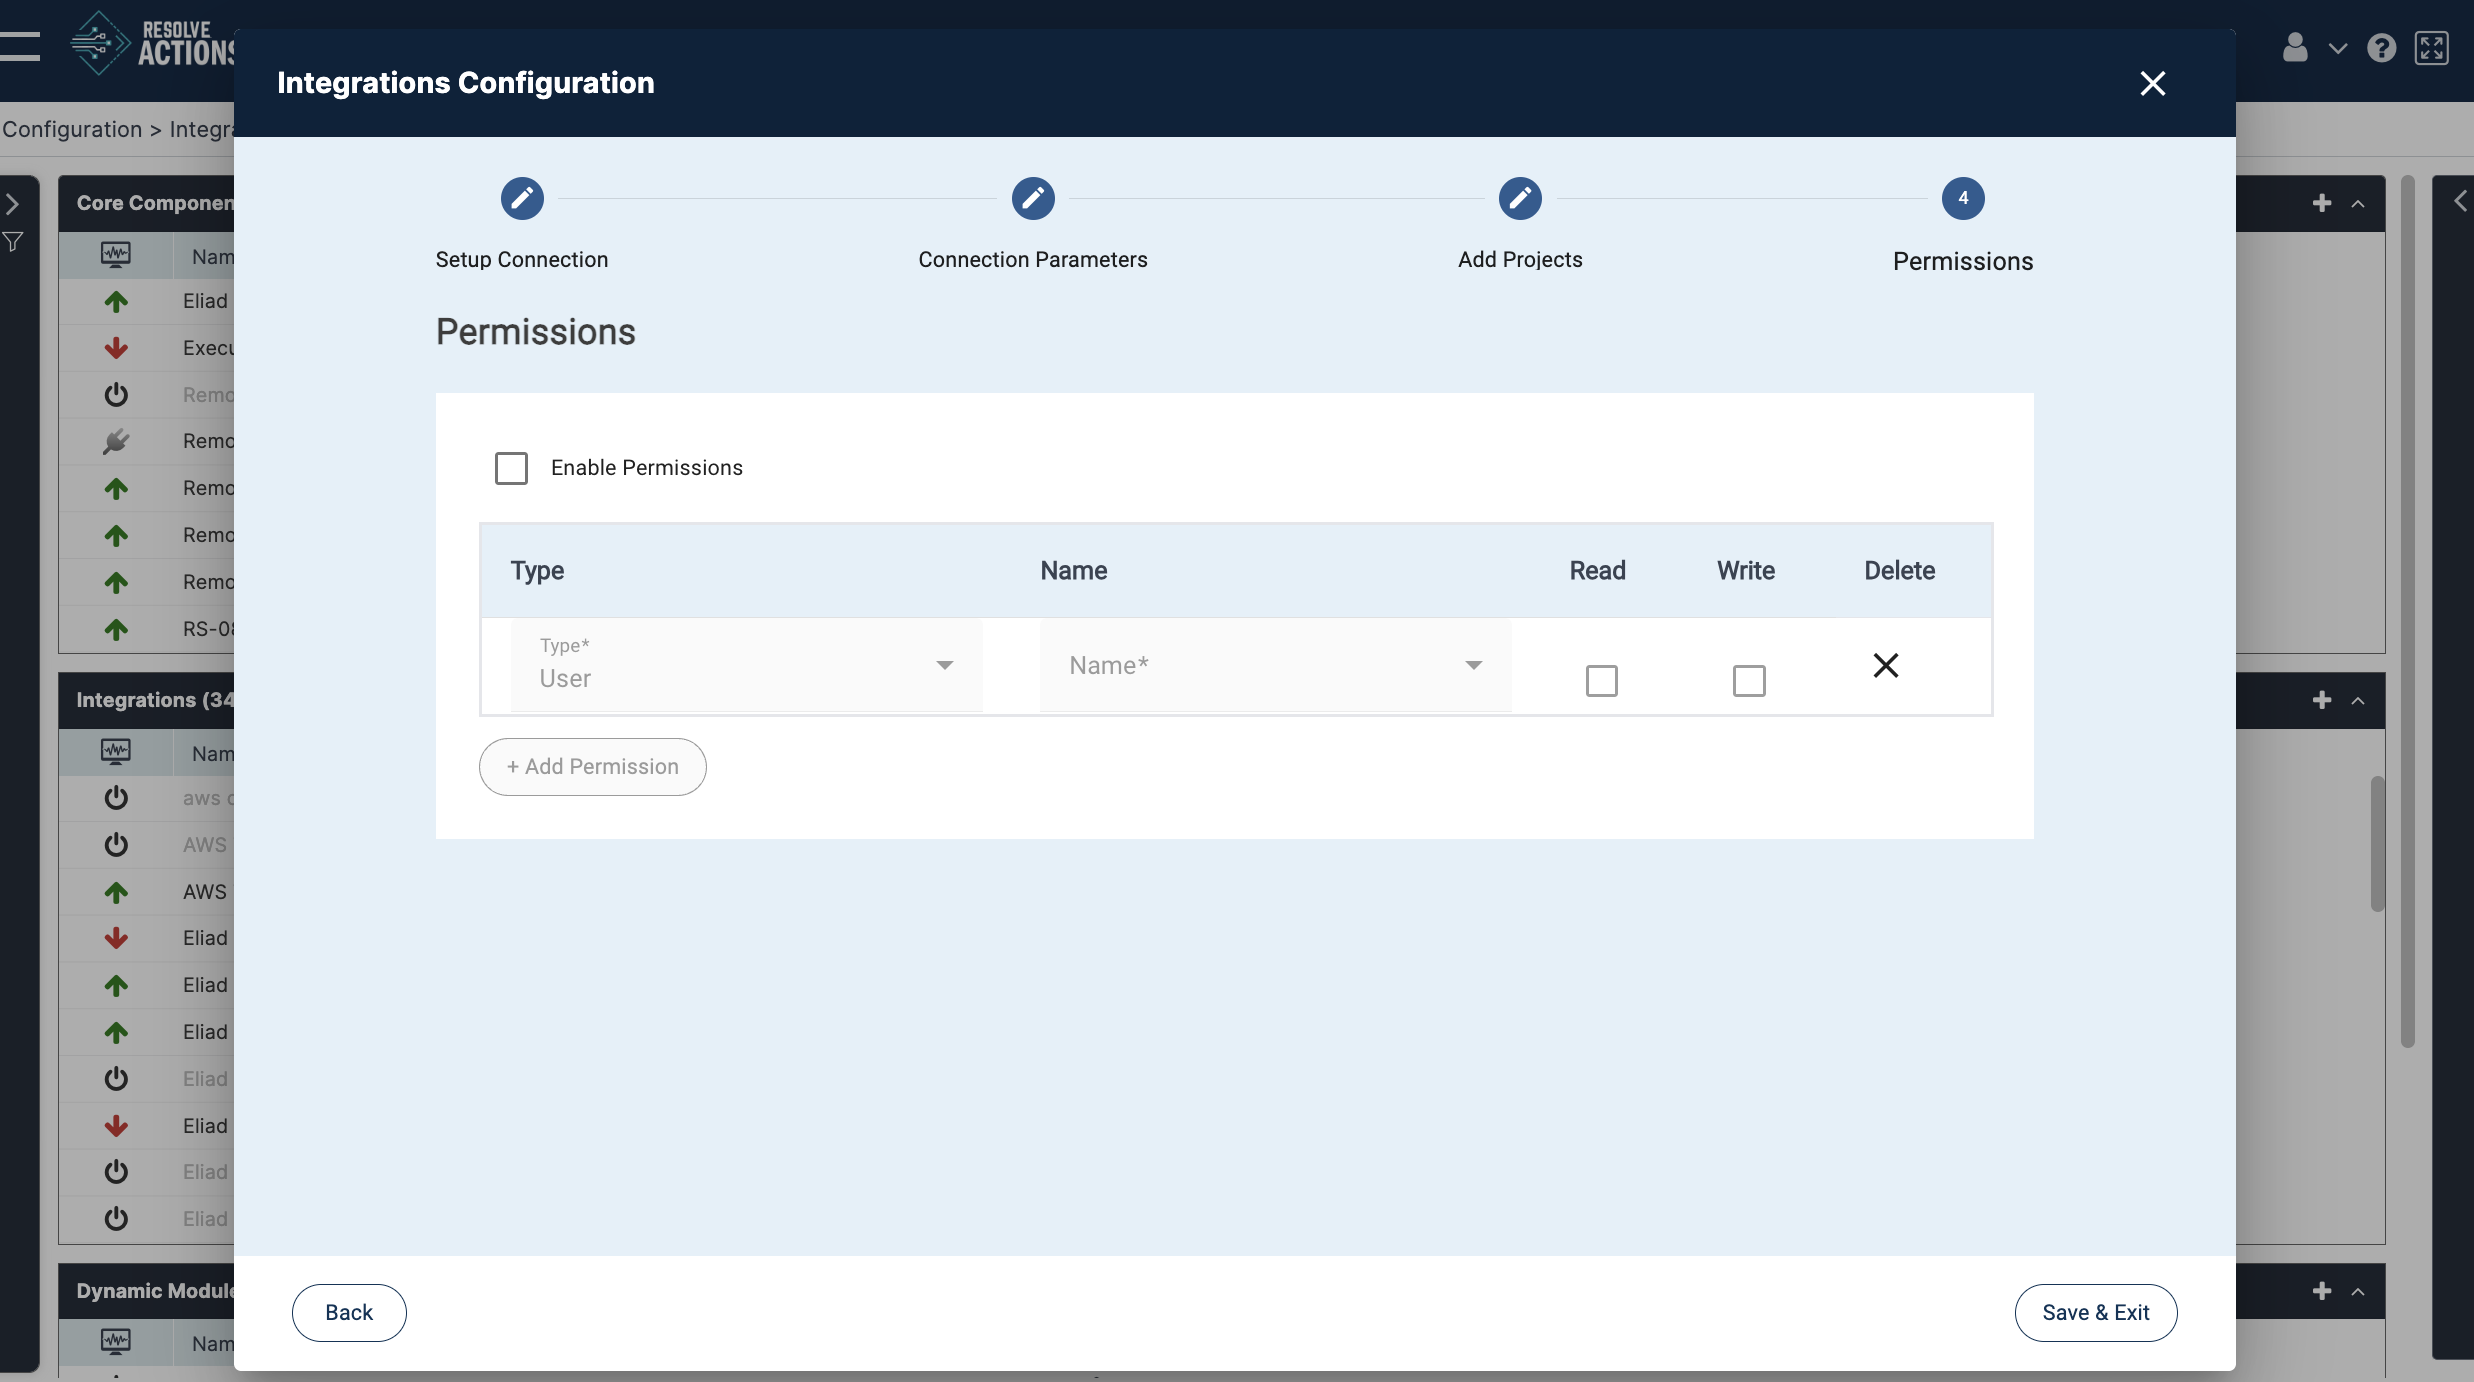
- In the Setup Connection step, complete the following fields:
- Name — Enter a descriptive name for the module instance. Use a name that lets you distinguish it from other instances.
- Description — Enter a description of the module instance.
- Type — Select BMC ITSM.
- Mode — Select the mode in which the module will run. The supplied configuration example uses Cloud.
- Monitor — Select this option if you want Actions to monitor the module instance.
- Tags — Optionally enter tags to help identify the module instance.
- Click Save & Continue to proceed to the connection parameters.
Configuring Connection Parameters
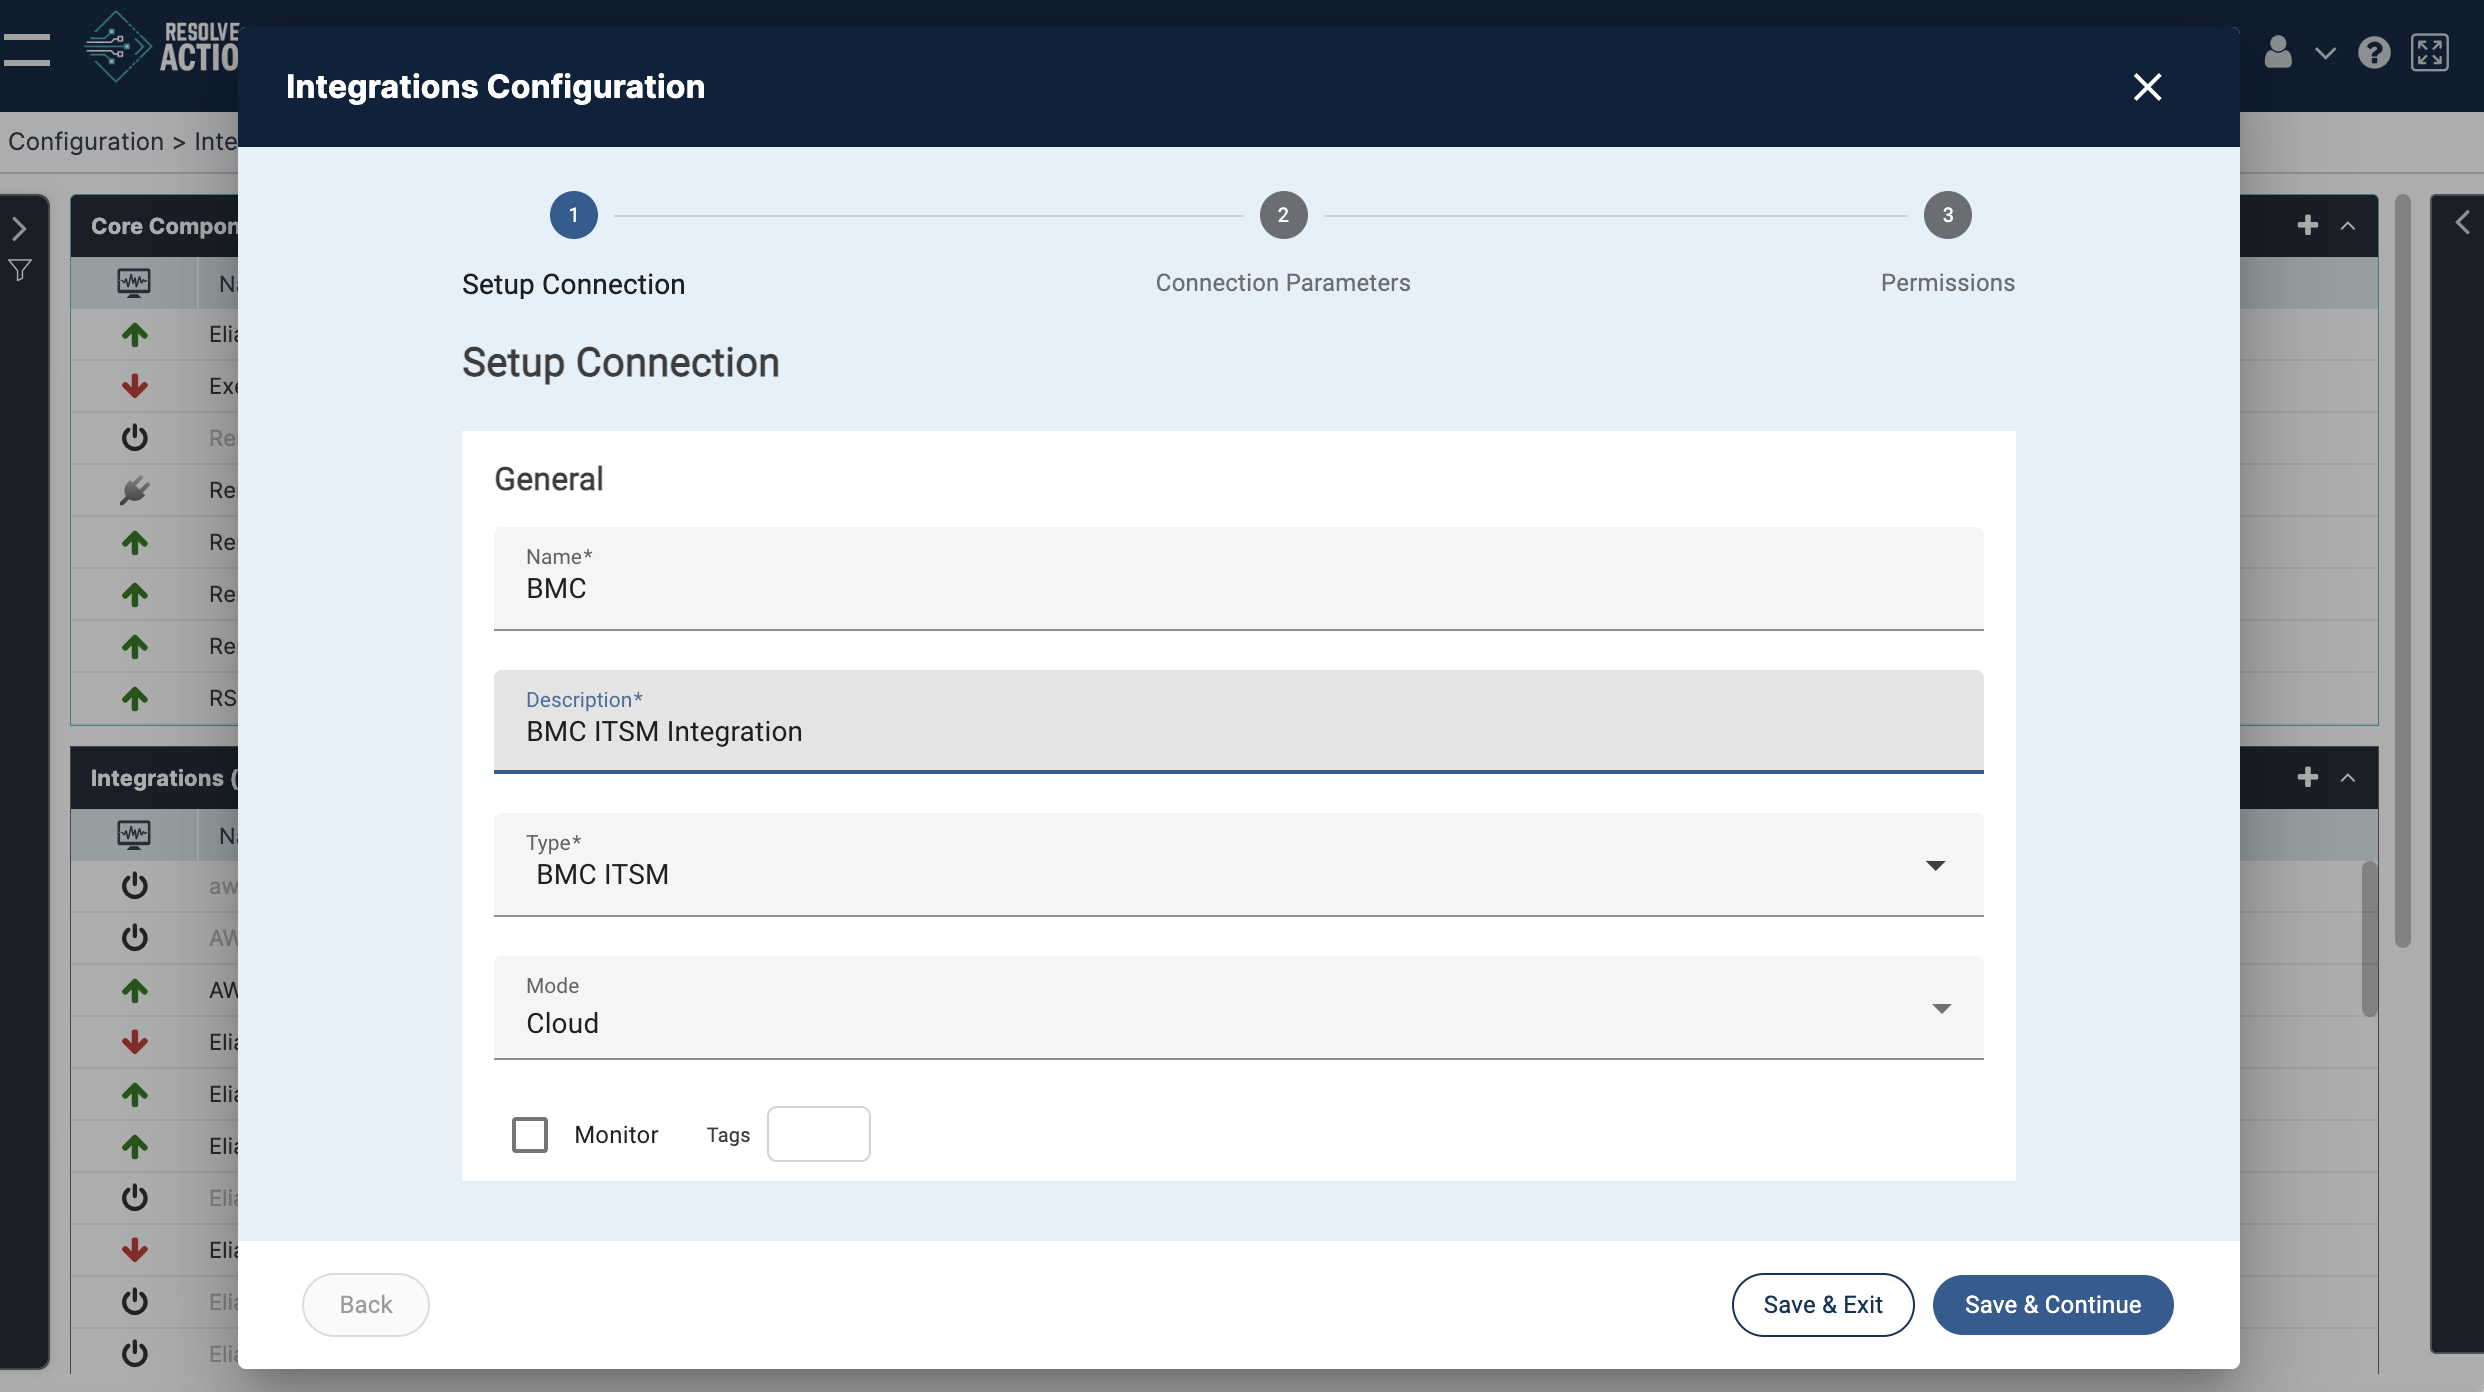
In the Connection Parameters step, specify the credentials used to connect to BMC ITSM.
- In URL, enter the URL of the BMC ITSM instance.
- In User Name, enter the username of the account used for the integration.
- In Password, enter the password for that account.
- Click Save & Continue.
All three connection parameters are required.
Adding Projects
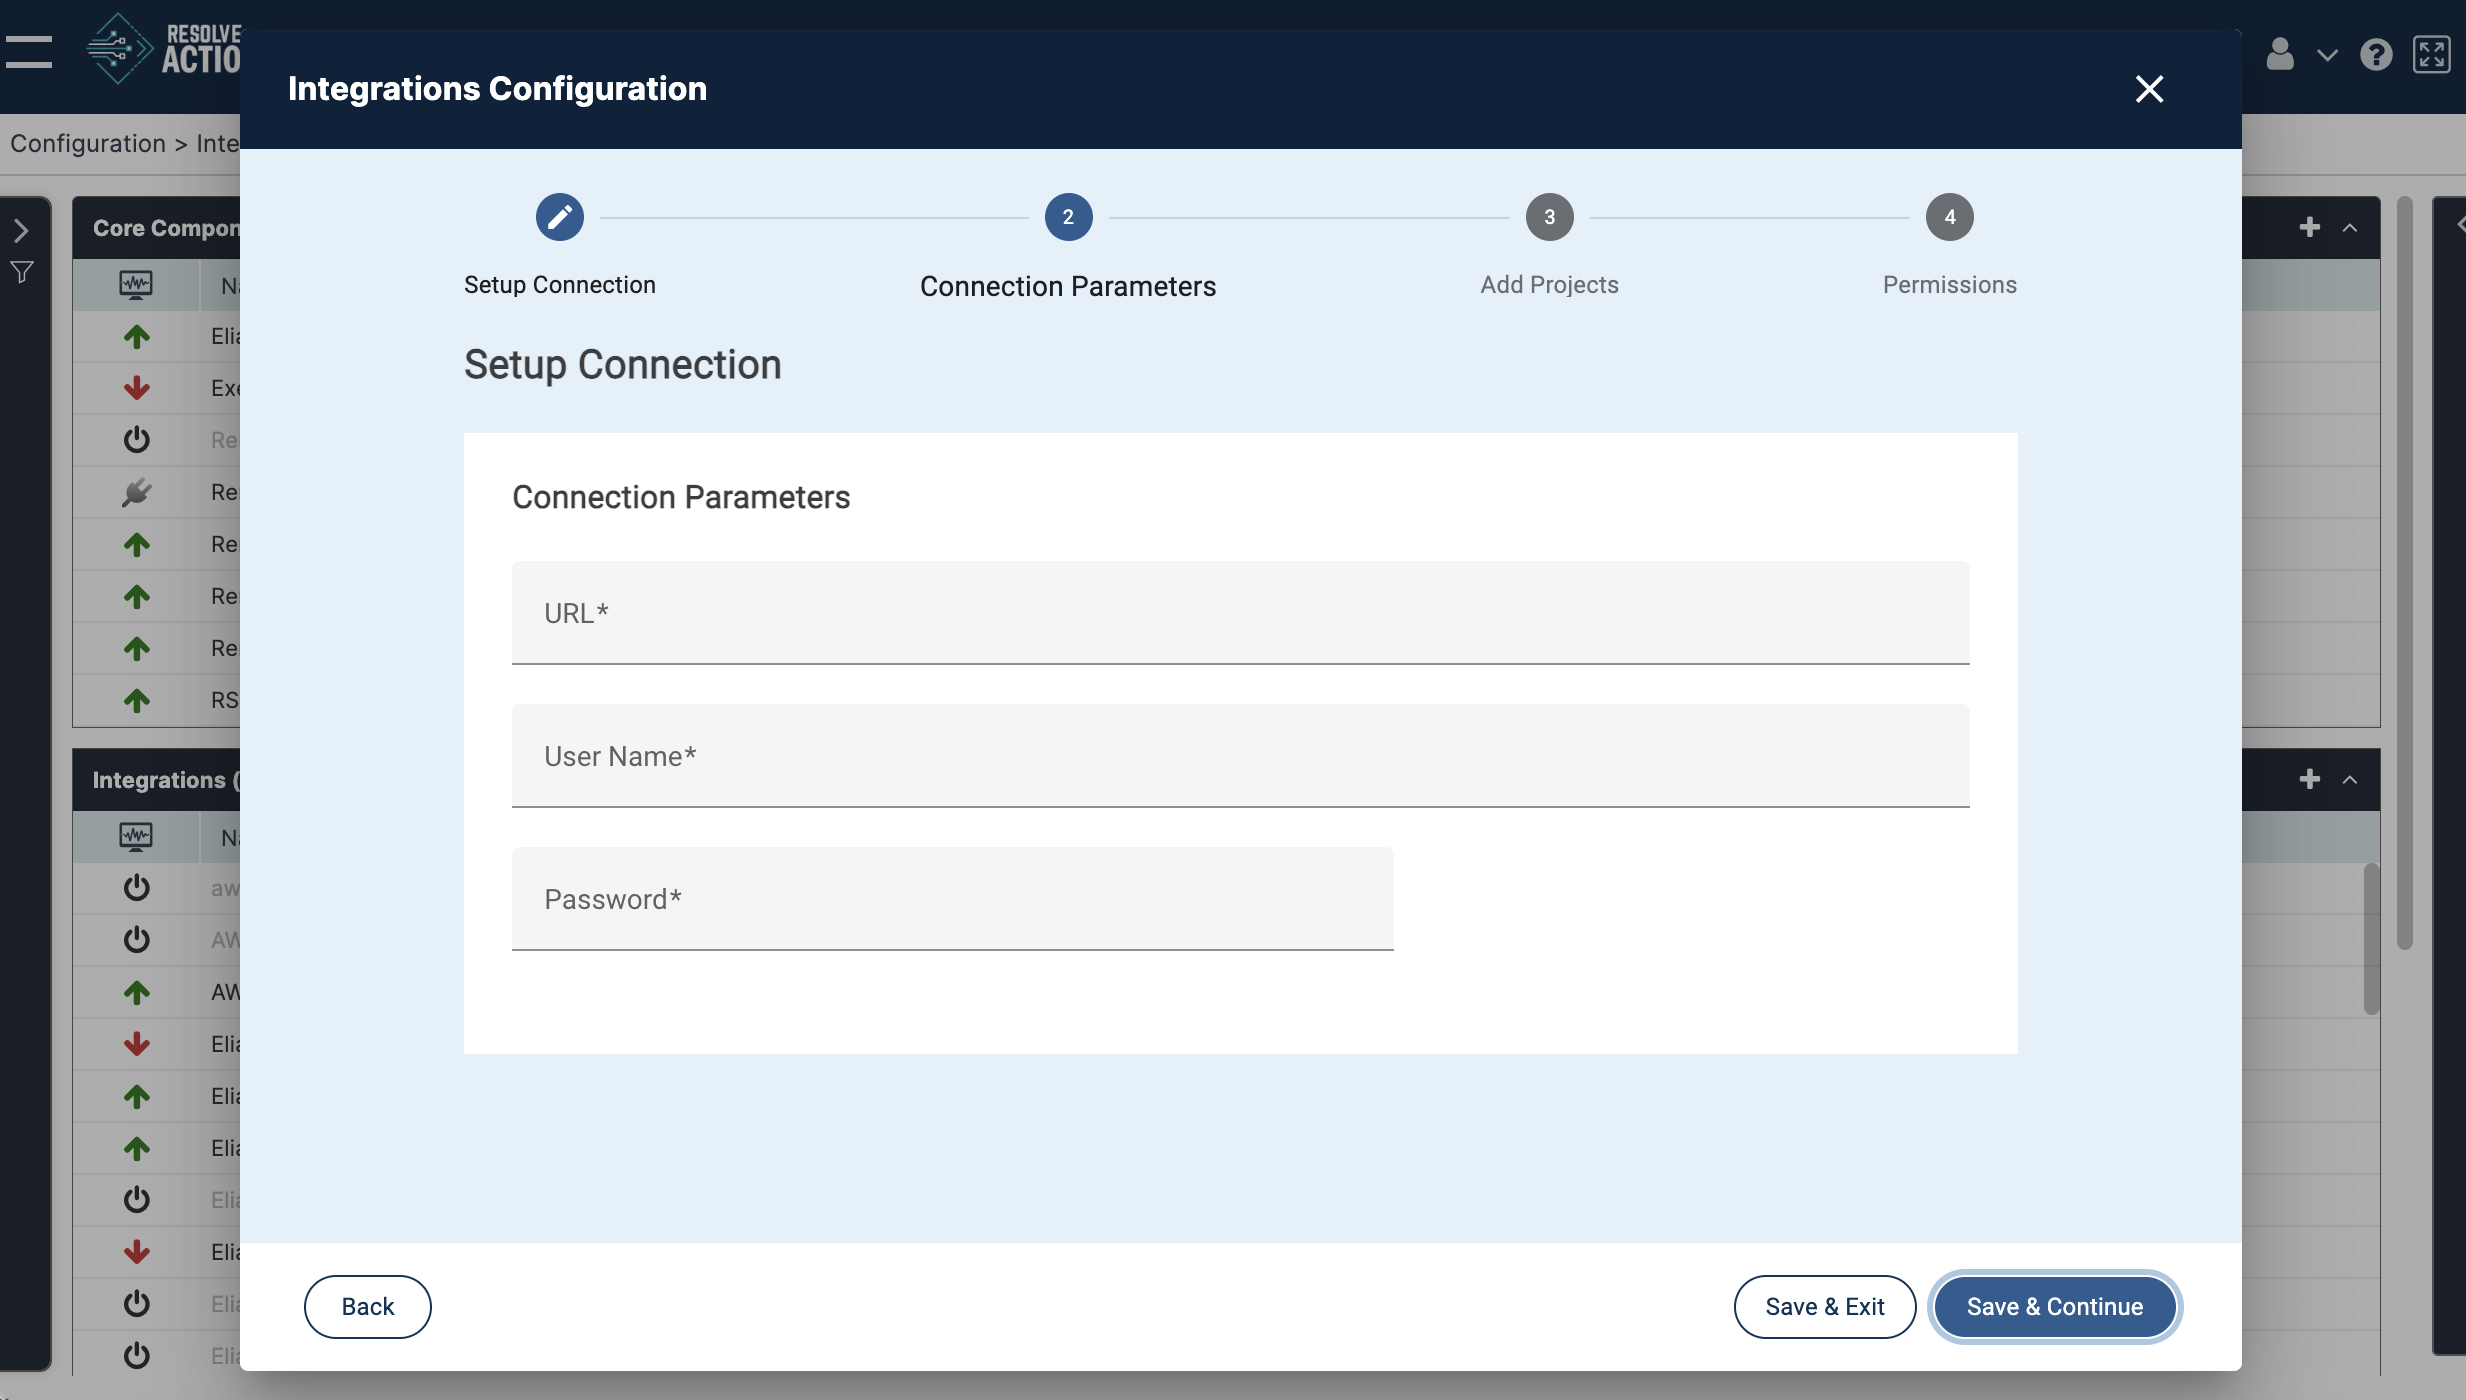
In the Add Projects step, select the BMC ITSM projects that you want to configure in Actions.
- In Project name, select a project from the drop-down list.
- Use the discovery icon next to the project name, where applicable, to retrieve project information.
- Configure the project options as needed:
- Monitoring — Select to monitor the project for updates.
- Monitoring Interval — Specify how frequently the module checks for updates when monitoring is enabled.
- Bypass Incident — Select to process events without creating Actions incidents.
- Execute on Every Update — Select to execute the associated workflow for every update rather than only the initial event.
- Use the Details, Filter, and Mapping tabs to review or configure additional project settings, as applicable.
- To configure another project, click + Add Project and repeat the steps.
- Click Save & Continue.
Configuring Permissions
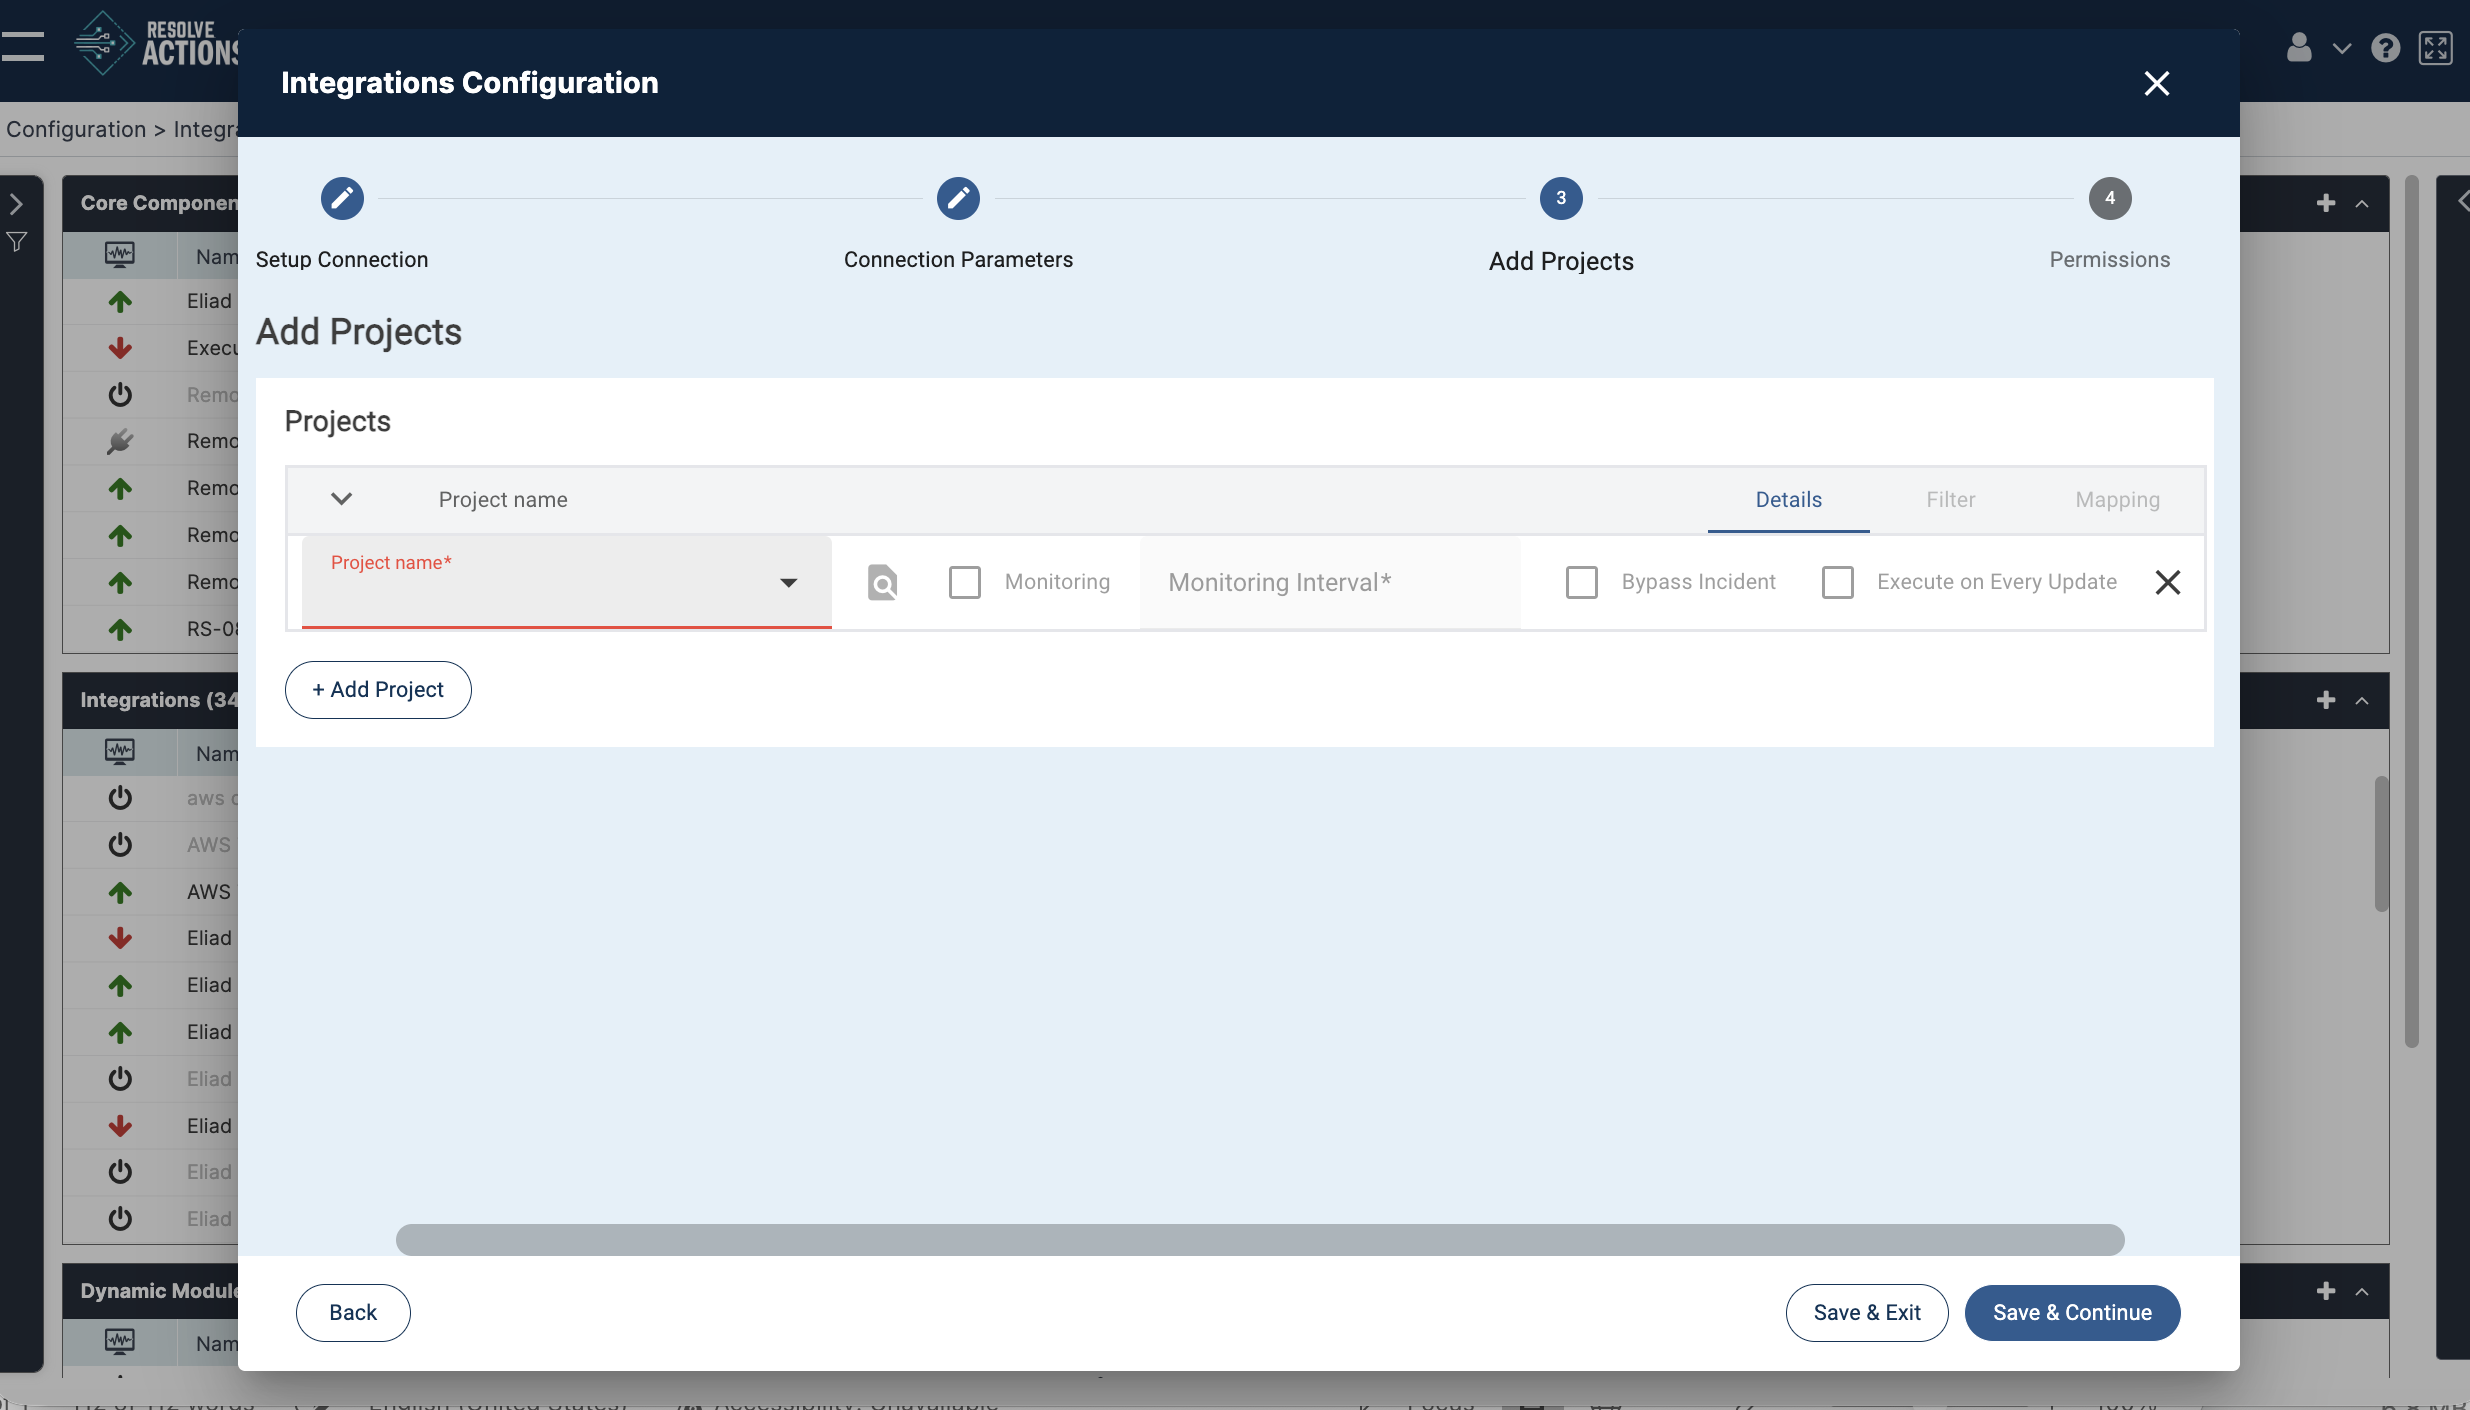
In the Permissions step, you can optionally specify which users have access to the module.
- Select Enable Permissions to enable permission settings.
- In Type, select the permission entry type. The supplied configuration screen shows User.
- In Name, select the user to whom the permissions apply.
- Select the required access permissions:
- Read — Allows read access.
- Write — Allows write access.
- Delete — Allows delete access.
- To add another permission entry, click + Add Permission.
- To remove an entry, click the X icon in its row.
- Click Save & Exit to save the configuration and close the window.
If you do not need to configure permissions, leave Enable Permissions cleared and click Save & Exit.