Create the Workflow
Open a New Workflow
- Navigate to the top hamburger menu.
- Click Builder > Workflow Designer.
- Click the + at the top of the design area.
For more on creating a new workflow, see Workflow Navigation
Add Activities
For this workflow, we will add a memory table, an activity that adds a row to the memory table, and two activities to update values in the cells. The final activity will be the self service response.
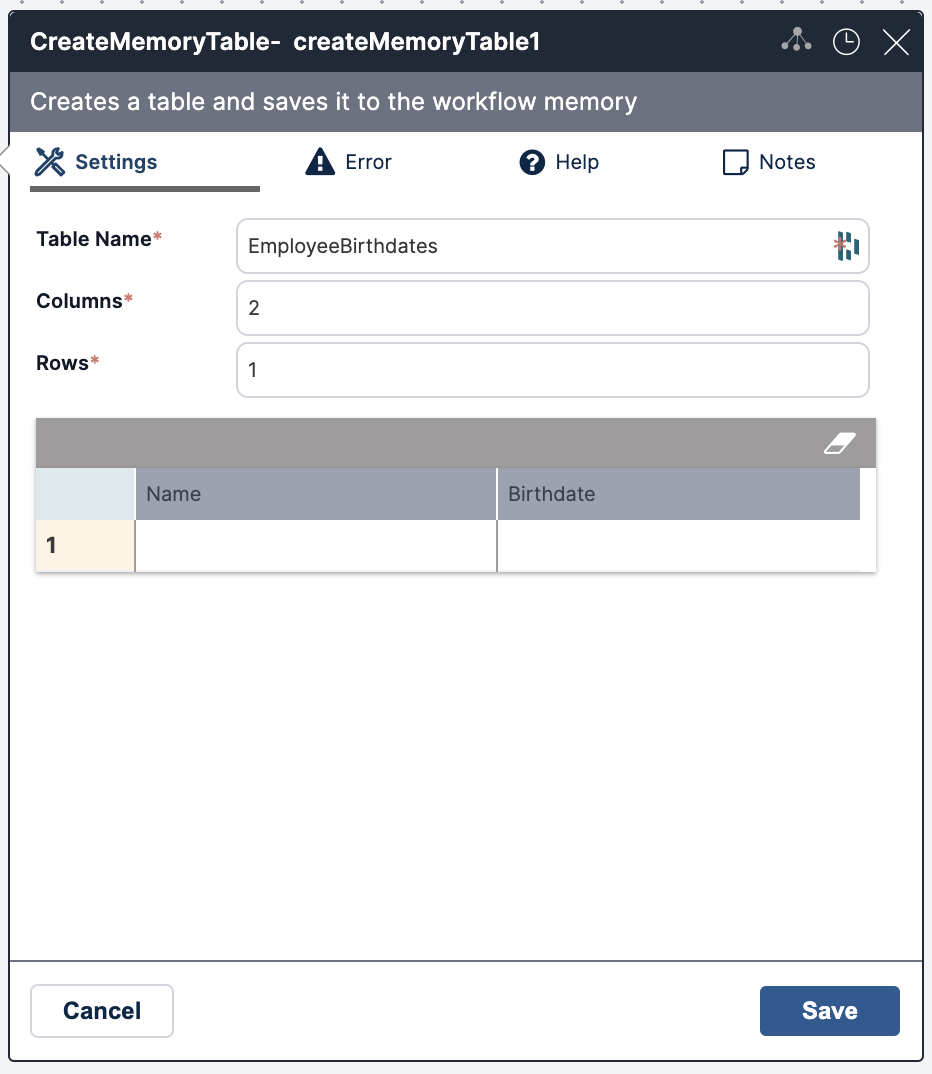
Create a Memory Table
- Add the CreateMemoryTable activity under the Start icon.
- Enter:
- Table Name: EmployeeBirthdates
- Columns: 2
- Rows: 1
- In the table, name the first column Name and the second column Birthdate.
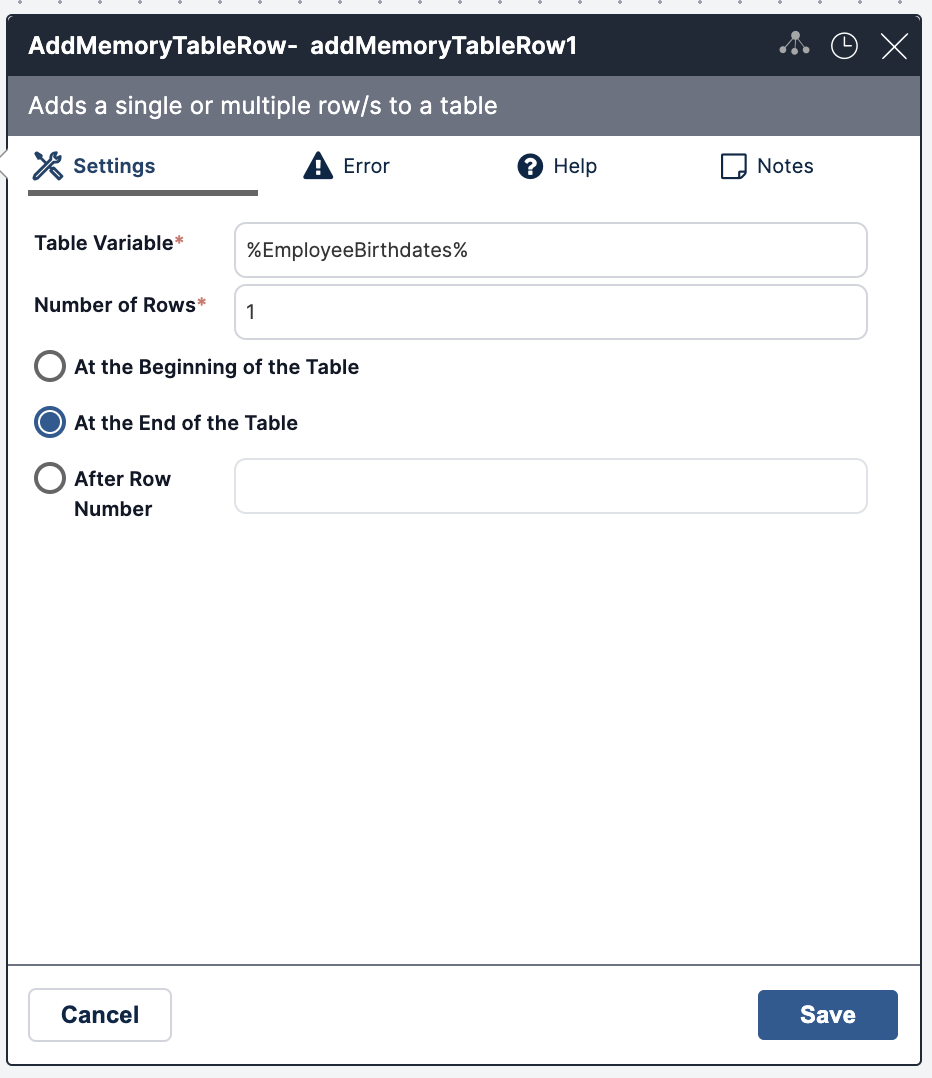
Add Memory Table Row
- Add the AddMemoryTableRow activity under the CreateMemoryTable activity.
- Enter:
- The Table Variable name from our CreateMemoryTable activity.
- Number of Rows: 1.
- Select At the End of the Table.
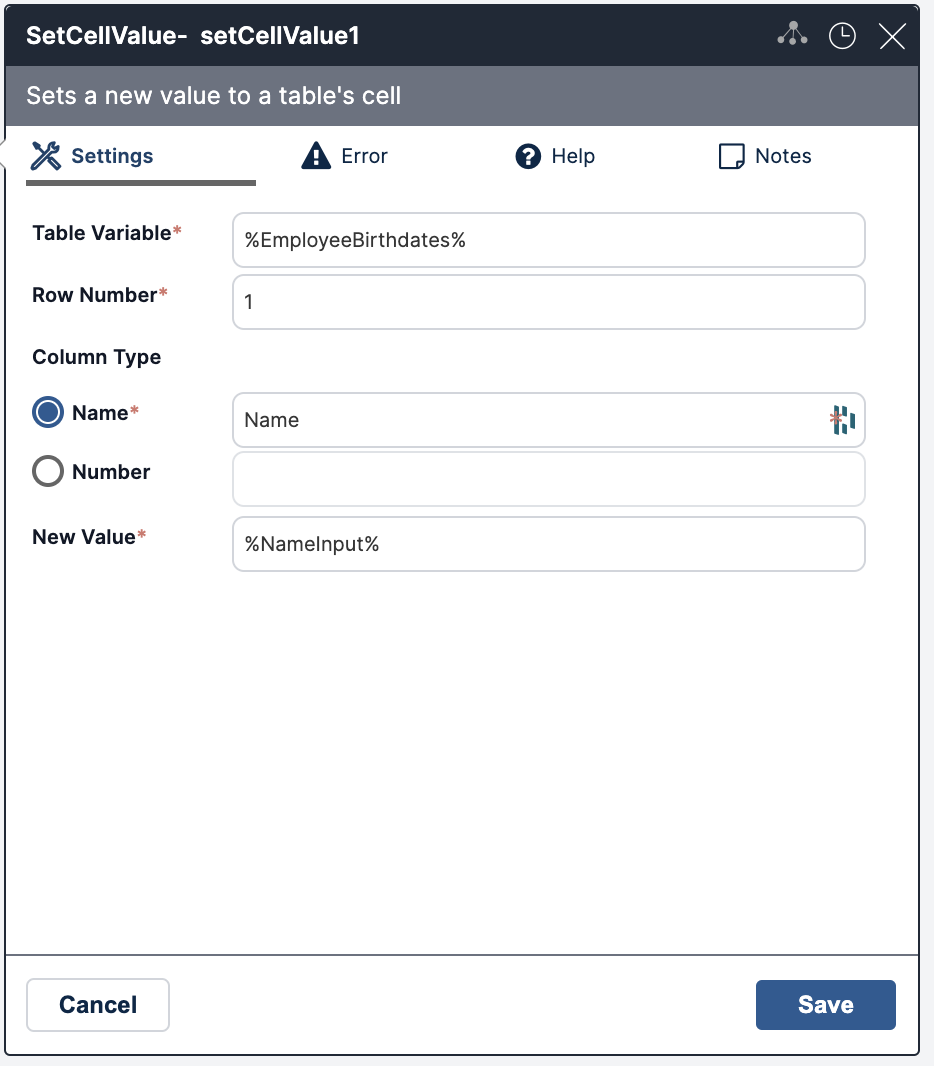
Add Set Cell Value
- Add the SetCellValue activity.
- Enter:
- The Table Variable name from our CreateMemoryTable activity.
- Row Number: 1.
- Column Type: Select Name and write Name in the field. Name is the title we gave column 1 in our CreateMemoryTable activity.
- New Value: enter a variable to be used in our form. (e.g. %NameInput%)
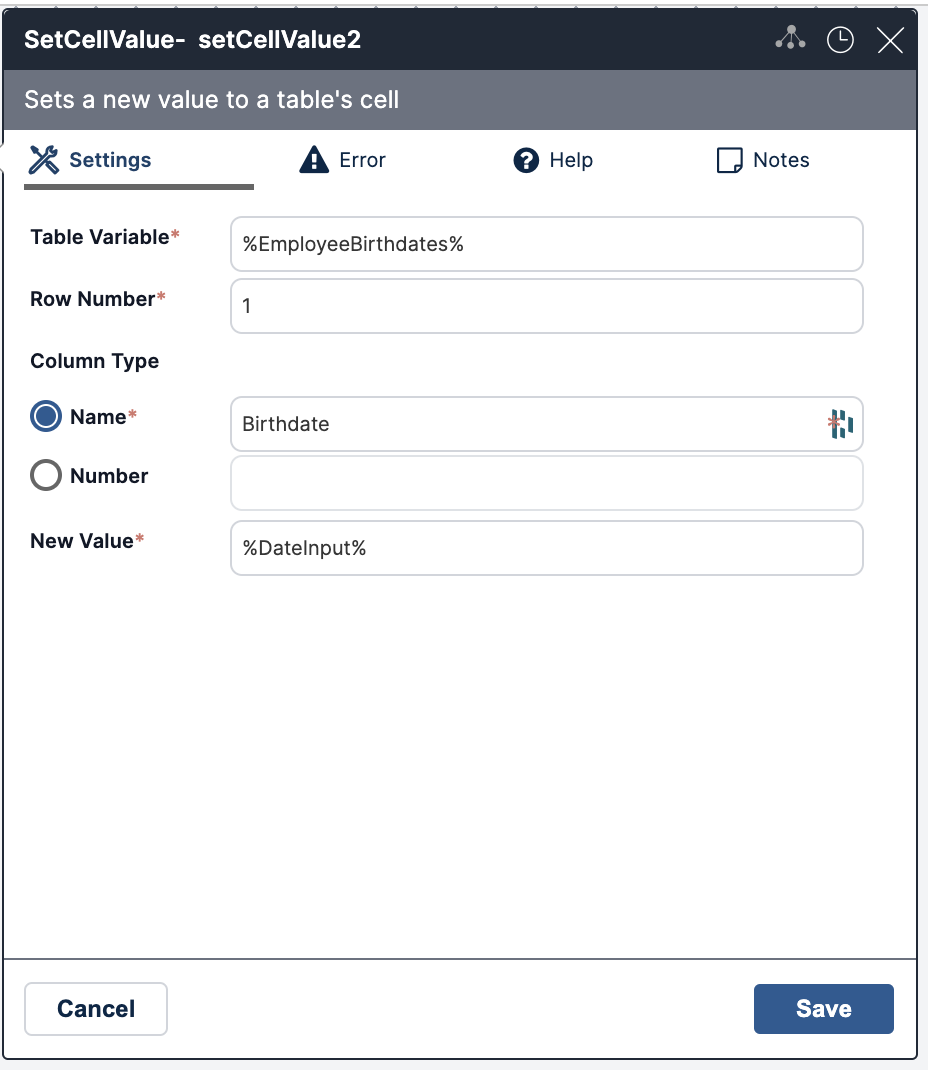
Add Set Cell Value
- Add another SetCellValue activity.
- Enter:
- The Table Variable name from our CreateMemoryTable activity.
- Row Number: 1.
- Column Type: Select Name and write Date in the field. Date is the title we gave column 2 in our CreateMemoryTable activity.
- New Value: enter a variable to be used in our form. (e.g. %DateInput%).
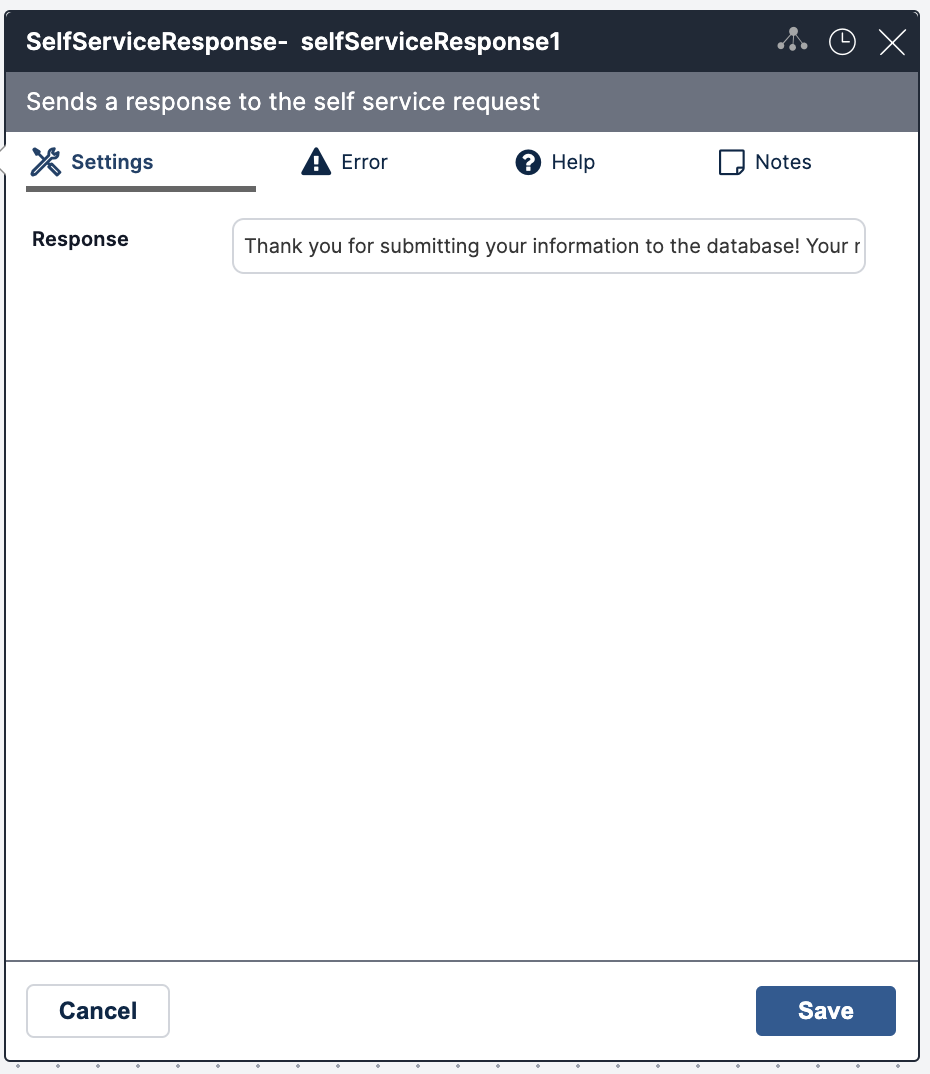
Add Self-Service Response Activity
- Add SelfServiceResponse activity.
- Enter:
- Response: Thank you for submitting your information to the database! Your name, %NameInput%, and birthdate, %DateInput%, have been recorded!
Save
Save your workflow and continue to create your form.